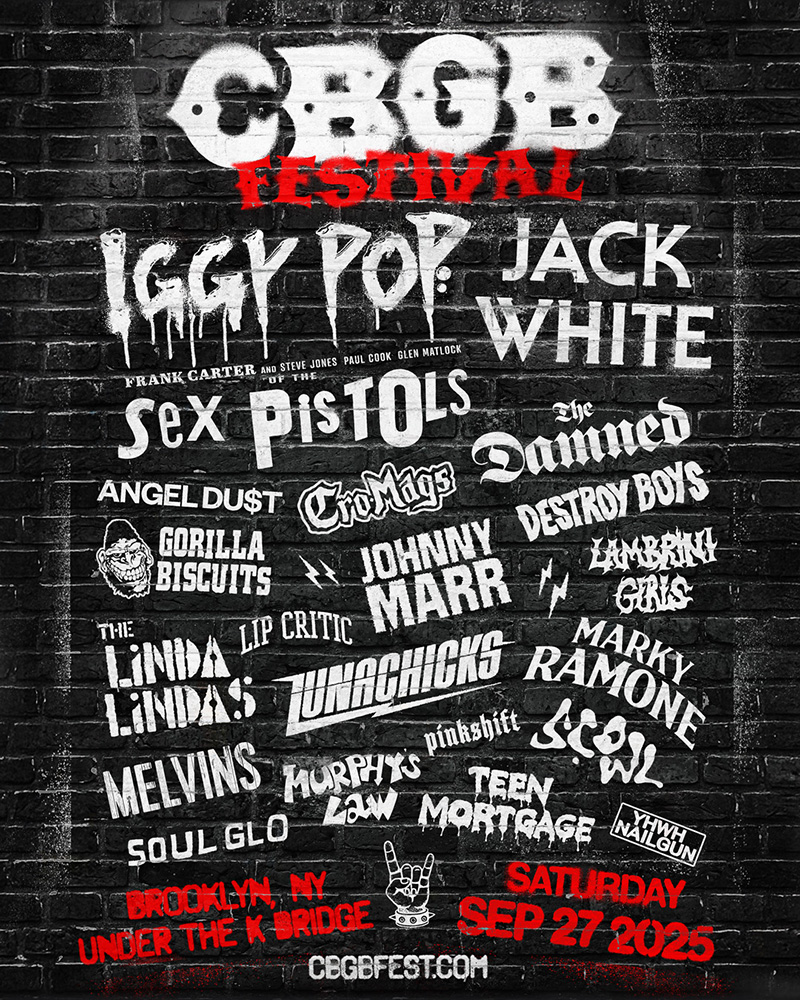
A FESTIVAL FOR UPLIFTING GOURMANDIZERS
Tickets
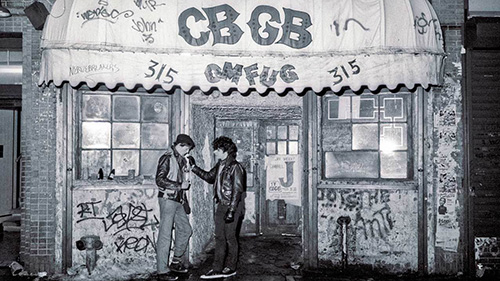
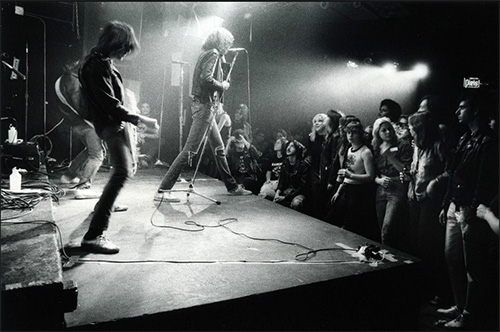
CBGB & OMFUG
Founded in 1973 in Manhattan's East Village, CBGB was ground zero for the seminal punk rock and new wave movements, launching the careers of bands like the Ramones, Blondie, Talking Heads, Television, Patti Smith Group, and The Beastie Boys. During the 1980s CBGBs would become home to the hardcore punk revolution, and in the 1990s the club featured early shows from some of the biggest grunge and metal bands. Over the past 50 years, CBGB has become the most famous, influential, and talked about rock & roll club of all time. While the Club closed in 2006, CBGB and its iconic logo continue to personify underground and alternative music and all that it still stands for.
CBGB: THE FESTIVAL
The CBGB Festival celebrates New York City’s gritty, sticker-covered past through the lens of the modern punk era, with a lineup bridging punk’s origins to its future torchbearers. Under The K Bridge was hand-selected as the perfect venue, both for its location in the cultural hub of Brooklyn and for the gritty industrial nature of the site itself. Expect a jam-packed full day of 20 bands across 3 stages, vintage and new merch collections, tons of local food & beverage options, and expansive CBGB installations including relics from the original club.